Protect Your Claim Before the Next North Georgia Storm
Roof damage often shows up right after a hard North Georgia storm, when rain, hail, or wind push water where it does not belong. In those first hours, it can feel stressful and confusing, especially when you know you may need to file a roof insurance claim. How you document the damage in the next 24 to 72 hours can make a big difference in what your insurer pays and how fast your home is repaired.
In this guide, we will walk through simple steps to protect your home, build a clear damage timeline, take photos and video that insurers respect, and gather strong inspection reports. At Vest Construction, we work on roofing and construction across North Georgia, and our team is led by a Professional Engineer and General Contractor, so we see both the building side and the insurance side of storm damage. Our goal is to help you stay safe and be ready with solid proof when it is time to file or defend a roof insurance claim.
First 24 Hours After Roof Damage
Safety comes first. Roofs after a storm can be slippery, weak, or full of loose debris. It is never worth getting hurt to check damage.
Right away, focus on three things:
- Stay off the roof, especially if it is steep, wet, or visibly damaged
- Watch for downed power lines and damaged trees around the home
- Look inside for active leaks, ceiling bulges, or water near electrical fixtures
If you notice water getting in, take simple emergency steps if it is safe for you:
- Place buckets or pans under drips
- Move furniture, rugs, and electronics away from wet areas
- Lay down plastic sheeting or towels to protect floors
If you can reach the attic through a safe access point, you might gently place plastic or a tarp over a small leak area. For anything beyond basic protection, it is better to have a professional roofer handle emergency tarping. That not only protects the home from more damage; it also creates credible documentation for your insurer.
Next, start a damage timeline right away. This can be a notebook, a note on your phone, or a simple document. Write down:
- Date and approximate time of the storm
- When you first noticed damage or leaks
- Any temporary repairs or tarping done, and by whom
If you can, save weather alerts, local news screenshots, or NOAA storm summaries that show what hit your area. A clear timeline connects your roof damage to a specific event, which is important to many roof insurance claim reviews.
Taking Photos and Video That Insurers Respect
Good photos and video tell the story of what happened without you having to argue. You do not need fancy equipment, just a phone and a careful eye.
Outside the home, start from the ground. Take:
- Wide shots of each side of the house and roof from different angles
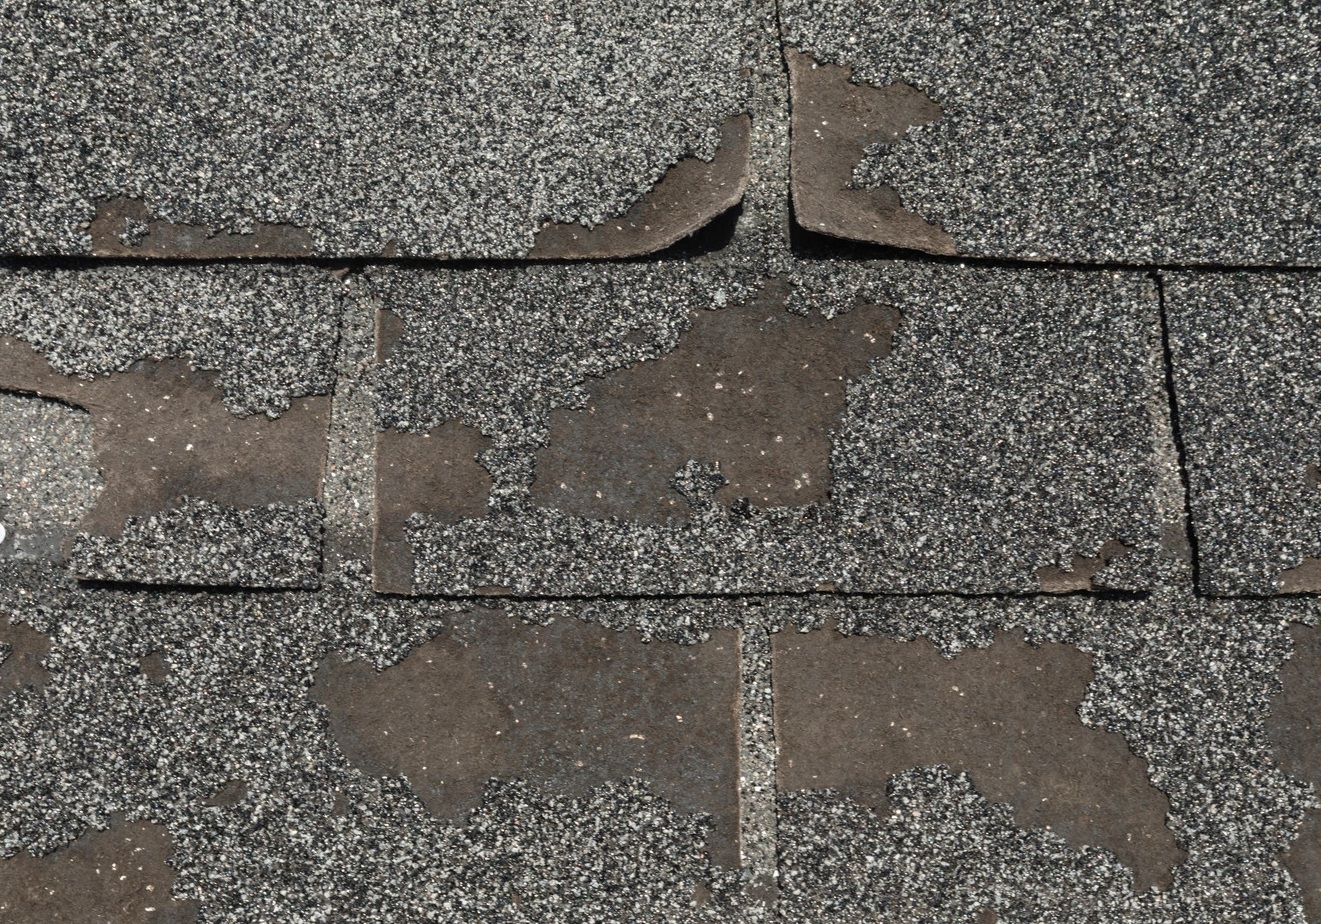
- Closer, zoomed-in photos of missing or lifted shingles, damaged flashing, or visible holes
- Photos of branches, limbs, or debris that hit the roof or are lying on it
Look for other storm signs that help support wind or hail damage:
- Hailstones next to a ruler or coin, if they are still on the ground
- Dented gutters, downspouts, window screens, or metal vents
- Marks or dings on metal roof sections, flashing, and AC units
Do not walk on a steep or damaged roof to get closer pictures. A professional crew can safely capture high-quality inspection photos with proper gear.
Inside, document any sign of water or structural issues. Take clear photos of:
- Ceiling stains, peeling paint, or bubbling drywall
- Damp or moldy insulation in accessible attic areas
- Warped flooring, wet carpet, or baseboards pulling away
- Personal items or furniture damaged by leaks
If you have older photos from before the storm, such as listing photos or family pictures that show your ceilings and walls, save those too. A simple before-and-after comparison can be powerful.
Short video walkthroughs work well. Slowly walk through each affected room, speak the date, and describe what you see. For example, note which room you are in, where the stain or damage is, and how soon after the storm you noticed it.
Finally, organize your photo evidence. Make digital folders grouped like:
- “Roof Exterior, [Date]”
- “Attic, [Date]”
- “Living Room, Ceiling Leak, [Date]”
Back everything up to cloud storage or another safe place. Organized visuals make it easier to share with the adjuster and your roofing contractor, which helps speed up review and cuts down on repeated questions.
Professional Inspections and Written Reports
Once you have basic photos and the area is stable, the next step is a professional inspection. A licensed, insured roofing contractor can evaluate the entire roofing system, not just what you see from the ground.
Hidden damage can exist in:
- Underlayment under the shingles
- Roof decking or sheathing
- Ventilation components and flashing
- Framing or structural members around valleys and ridges
A detailed inspection report can help if the first insurance estimate is low or only covers part of the damage. It gives your adjuster clear, technical support for needed repairs or a full replacement.
A strong inspection report should include:
- Roof type, materials, and approximate age
- Clear description of each damaged area, with labeled photos
- Measurements and layout of slopes, ridges, and valleys
- Recommended repairs or replacement with reasons
- Notes on local building code requirements and how they apply
The report should also link the damage to storm causes such as hail impact, wind uplift, or falling debris, and explain how this affects the remaining life of the roof.
When your insurance adjuster schedules a visit, try to arrange for your roofing contractor to be present. Walking the roof together helps make sure:
- All damage is seen on the first visit
- Technical questions get answered on the spot
- There is less need for re-inspections or long delays
Contractors who work often with insurers understand how to present findings in a way adjusters can use in their reports.
Building a Strong Proof-of-Loss Package
For larger roof claims or if there is a dispute, your insurer may require a proof-of-loss. This is a sworn statement listing the amount you are claiming and the supporting details. Deadlines for this are often strict and can vary by policy, which is why early organization matters so much.
Take time to read your policy or ask your agent what your insurer expects for a roof insurance claim in Georgia. Knowing your duties ahead of time can help you avoid missed steps.
Your claim file should include:
- Timeline of the storm and damage discovery
- All photos and videos, clearly labeled
- Invoices or receipts for emergency tarping and temporary repairs
- Professional inspection reports and written findings
- Contractor estimates for repair or replacement
- Receipts for temporary housing or out-of-pocket costs, if any
Keep a simple communication log too. Write down dates, times, and a short note about each call or email with the insurer and contractors. This gives you a clear record if questions come up later.
Having more than one professional estimate can support realistic repair or replacement costs. Estimates from a reputable contractor show what it actually takes to fix the roof to a safe, code-compliant level.
Try to avoid common documentation mistakes:
- Do not throw away damaged shingles, underlayment, or other materials until your adjuster or contractor has had a chance to see them
- Be careful with any checks or documents labeled as “full and final,” unless you are sure the scope is complete and correct
- Do not exaggerate or add damage that did not come from the storm
Sticking to accurate, well-documented facts helps protect your credibility and keeps your claim on steady ground.
Turning Good Documentation Into a Fair Settlement
When your photos, videos, timelines, inspection reports, and receipts all tell the same clear story, your insurer has a strong, organized package to review. That often leads to fewer questions, fewer delays, and a result that better reflects the real condition of your roof.
North Georgia storms can roll in quickly, and roof damage can get worse with each new round of wind and rain. Planning ahead, knowing what to document, and bringing in a qualified roofing and construction team can help you move from shock after a storm to a fair, well-supported roof insurance claim and a roof repaired the right way.
Get Started With Your Project Today
If you are facing storm damage or leaks, we can guide you through every step of yourroof insurance claimso you are not handling it alone. Our team at Vest Construction will inspect your roof, document damage, and coordinate with your adjuster to help you pursue the coverage you deserve. When you are ready to move forward or have questions about your options, simplycontact usand we will respond promptly.